

Match the person’s specific functional tasks to tool features, run short trials with measurable outcomes, and document every result in writing for the IEP. That three-step sequence is how to select adaptive technology for autism without wasting months on devices that get abandoned in a drawer.
Start here, in the next hour:
- Write down one task the person struggles to complete independently (requesting a need, following a schedule, reading a passage).
- List the specific barriers: motor demands, sensory sensitivities, communication level, and the environments where the task occurs.
- Contact the school or a qualified evaluator to request a formal assistive technology (AT) assessment in writing.
Table of Contents
- What assistive technology is and the levels you need to know
- How to assess needs before choosing any device
- Feature-matching and running trials: the decision workflow
- What U.S. law requires: IDEA, IEP consideration, and who pays
- A practical selection checklist: questions to ask and red flags to avoid
- Concrete AT examples organized by functional goal
- How to implement the selected AT and train everyone involved
- Where to get devices and common U.S. funding routes
- Typical timeline from assessment to device in hand
- When the chosen AT isn’t working: a diagnostic checklist
- Key Takeaways
- What realistic AT adoption actually looks like
- Find local AT evaluators and providers through Autismdoctorsearch
- Authoritative sources and next reads
What assistive technology is and the levels you need to know
Assistive technology, often called AT, refers to any device, software, or system that helps a person with a disability access, communicate, regulate, or function more independently. For autism specifically, that means tools that reduce barriers to communication, daily living tasks, learning, sensory regulation, and safety.
AT spans four levels of sophistication, and knowing the difference matters because the right level depends on the person’s motor control, communication style, and environment, not on how “severe” their autism is.
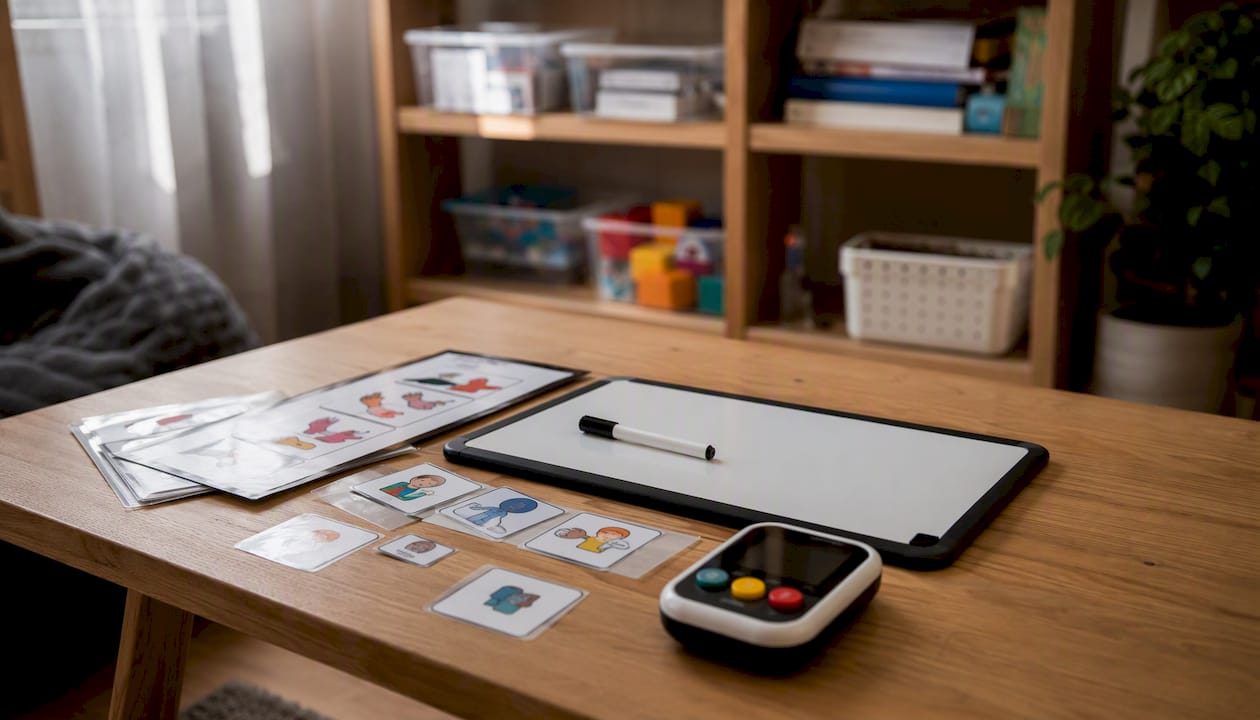
No-tech: No device required. Picture exchange systems, object schedules, and visual boundary markers on a desk are all no-tech AT. Low cost, easy to replace, and often the right starting point.
Low-tech: Simple, inexpensive tools with minimal electronics. Pencil grips, slant boards, laminated visual schedules, and dry-erase communication boards fall here. Durable and portable.
Mid-tech: Battery-powered or simple electronic tools. Recordable picture cards (like GoTalk devices), timers with visual displays, and basic voice-output communication aids. More capability, still manageable for most caregivers.
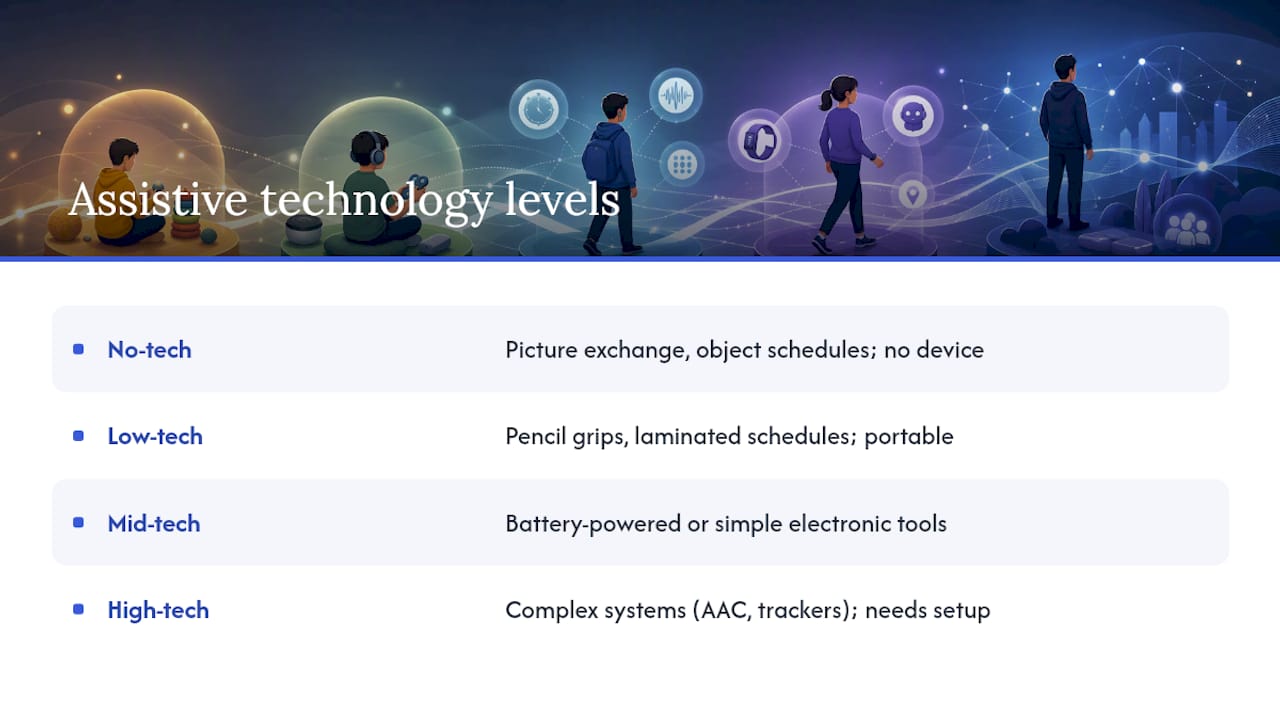
High-tech: Complex electronic systems requiring setup, training, and maintenance. Dedicated AAC (augmentative and alternative communication) devices, speech-generating devices, text-to-speech software, and GPS safety trackers. High potential, but only appropriate when the person’s motor and cognitive profile supports it and when training is in place.
The four-level classification is a starting framework, not a hierarchy. A no-tech visual schedule used consistently beats a high-tech app that nobody knows how to program.
How to assess needs before choosing any device
The biggest mistake teams make is naming a device before defining the task. Assessment starts with a specific functional question: what exact task does this person need to do that they currently cannot, or cannot do independently?
A solid assessment covers these data points:
- Task steps: Break the target task into its component steps. Where does the person stop, get stuck, or need a prompt?
- Success and failure rates: How often does the person complete the task independently across three to five observations? This is your baseline.
- Prompts required: How many prompts, and what type (verbal, gestural, physical)? Prompt level is a direct measure of independence.
- Environment demands: Where does the task happen? Classroom, cafeteria, home, community? Noise level, lighting, and social density all affect which tools work.
- Sensory triggers: Does the person avoid certain textures, sounds, or visual inputs? A device that produces unexpected sounds or requires sustained tactile contact may be rejected immediately.
- Motor access constraints: Can the person point accurately? Use a stylus? Operate a switch? Motor access determines whether a touchscreen, eye-gaze system, or physical button is appropriate.
The AT Decision-Making Tool from OCALI/ATAEM walks teams through a stepwise process: identify the task, review current supports, consider universal tools already available, then move to a formal AT assessment only when those options fall short.
Who should be on the team:
- Caregiver: Knows the person’s home routines, sensory history, and what has been tried before.
- Classroom teacher or special education teacher: Observes academic and social task demands daily.
- Speech-language pathologist (SLP): Leads communication and AAC assessment.
- Occupational therapist (OT): Evaluates motor access, sensory processing, and daily living tasks. OT contributions to AT assessments are often underused, especially for fine motor and sensory considerations.
- AT specialist or certified AT evaluator: Conducts formal feature-matching and device trials.
To request a formal AT assessment through the school, submit a written request to the special education director or IEP team coordinator. Schools must follow evaluation procedures once a written request is received.
Feature-matching and running trials: the decision workflow
Feature-matching means listing the task demands first, then searching for tools that meet those demands — not the other way around. Write out the exact feature set the tool must have before you look at product names. For example: “must produce synthesized speech output, operate with a single finger tap, tolerate a noisy classroom, and fit in a backpack.”
The SETT framework (Student, Environments, Tasks, Tools) is a practical scaffold for this. Work through Student needs and abilities, the Environments where the task occurs, the specific Tasks required, and only then consider Tools. Teams that skip to Tools first almost always end up with a mismatch.
A reproducible trial protocol:
| Task | Baseline metric | Device/feature tested | Trial duration | Outcome metric | Notes |
|---|---|---|---|---|---|
| Requesting a snack | 1/5 independent attempts | AAC app with core vocabulary | 2 weeks, 3x daily | Independent requests per session | Prompt level tracked daily |
| Following morning routine | 4 prompts per routine | Visual schedule app with audio | 3 weeks | Prompts required per routine | Compared to paper schedule baseline |
| Writing a sentence | — | Word prediction software | 2 weeks | — | Caregiver and teacher both record |
Trial length of several weeks in the natural environment is the standard. Shorter trials rarely produce enough data; longer ones delay decisions unnecessarily. Collect data at least three times per week and record both the outcome metric and the prompt level.
Pro Tip: When the team cannot agree on a device, stop debating and run a structured trial. Objective trial data are the most persuasive evidence in any IEP discussion, and they protect everyone from making a decision based on preference rather than performance.
What U.S. law requires: IDEA, IEP consideration, and who pays
IDEA requires IEP teams to consider assistive technology for every student with an IEP at each annual review or revision. If the team determines AT is needed for the student to receive a free appropriate public education (FAPE), the district must provide it at no cost to the family.
“Consideration” is not a checkbox. It must be a data-driven discussion that links specific technology to functional barriers and IEP goals. An IEP that notes “AT considered — not needed” with no supporting data or discussion is likely noncompliant. If that happens, parents can request a formal AT assessment in writing, which triggers the district’s evaluation obligations.
Documentation best practices for IEP teams:
- Link AT directly to the student’s Present Levels of Academic Achievement and Functional Performance (PLAAFP) and to specific IEP goals.
- Name features and functions in the IEP, not brand names. “A speech-generating device with dynamic display and core vocabulary access” is more durable than “an iPad with Proloquo2Go.”
- Request AT services (training for staff and caregivers, setup, and follow-up) explicitly in the IEP. A device without training is rarely used.
- Note that built-in universal tools like text-to-speech and dictation can qualify as AT when needed for FAPE, but they must be written into the IEP to guarantee access during instruction and testing.
Caregiver checklist for IEP meetings:
- Bring written documentation of the functional task barriers you have observed at home.
- Ask the team to show the data that informed their AT consideration decision.
- If AT was not recommended, ask in writing for a formal AT assessment before signing the IEP.
- Request that AT services (training, setup, follow-up) be listed as a related service in the IEP.
- Ask for a review date to assess whether the AT is working, separate from the annual review if needed.
Understanding how IEP documentation works is the foundation for securing the right technology and keeping it in place across school years.
A practical selection checklist: questions to ask and red flags to avoid
Once trial data is in hand, use these criteria to make the final call:
- Task fit: Does the tool address the specific task barrier identified in the assessment? Not “communication in general” — the exact task.
- Feature match: Does it have every required feature from the feature-matching list? Missing one critical feature often means the tool fails in practice.
- Motor access: Can the person operate it given their current motor skills? Test grip, reach, accuracy, and fatigue.
- Sensory tolerability: Does the device produce sounds, vibrations, or visual feedback the person can tolerate? Ask about volume control, screen brightness, and haptic settings.
- Portability: Will it go where the person goes? A device that stays on a shelf at school because it’s too heavy to carry to lunch is not working.
- Social acceptability: Does the form factor draw unwanted attention? A device that looks like a standard tablet is often more accepted than a specialized unit with a stigmatizing appearance.
- Cost and funding route: What is the realistic path to funding? School district, Medicaid waiver, private insurance, or a grant? Match the device to the most accessible funding route.
- Training requirements: How long does it take to learn? Who will train the person, caregivers, and school staff? Is vendor training available and included?
- Ongoing support: What happens when it breaks? Is there a warranty, a loaner program, and a local repair option?
Questions to ask vendors and therapists:
- Can we trial the device in the natural environment before committing?
- What training is included, and is it available for both school staff and caregivers?
- What is the warranty and replacement policy?
- Can we export data from the device to document progress?
- Are replacement parts and accessories available in the U.S.?
Red flags that predict poor adoption:
- The device requires more than two steps to access the primary function.
- No training plan exists for caregivers or school staff.
- The team selected the device based on familiarity or cost alone, not trial data.
- The form factor is stigmatizing and the person has expressed discomfort with it.
- No follow-up or monitoring is planned after the device is introduced.
Concrete AT examples organized by functional goal
Different goals call for different tools. Here is a goal-based overview of common AT categories for autism, with notes on technical level and key considerations:
Communication and AAC:
- Picture Exchange Communication System (PECS): no-tech, used in home and classroom; requires fine motor ability to hand over cards; trials typically available through SLPs.
- Speech-generating devices (SGDs) with dynamic display: high-tech; requires motor accuracy for touch or switch access; used across home, school, and community; most school districts have loaner devices for trials.
- Text-to-speech apps on standard tablets: mid-to-high-tech; widely available, low stigma, and often already in the home; must be written into the IEP to guarantee school access.
Reading and writing supports:
- Word prediction software: mid-tech; reduces keyboarding demands; works on most school devices; low motor demand.
- Text-to-speech and audiobook platforms: low-to-mid-tech; supports reading comprehension without requiring decoding; available through many school districts as universal tools.
Executive function and organization:
- Visual schedule apps with audio prompts: mid-tech; used at home and school; low motor demand; highly portable on a standard tablet or phone.
- Countdown timers with visual displays: low-tech; reduces transition anxiety; inexpensive and durable.
Sensory regulation:
- Weighted lap pads and compression vests: no-tech; used in classroom and home; no motor demands; OT guidance recommended for appropriate weight and duration.
- Noise-canceling headphones: low-tech; widely available; critical for community settings; check for sensory tolerance to ear pressure before committing.
Safety and GPS:
- GPS wearables and trackers: high-tech; used in community settings; requires caregiver monitoring via app; subscription costs apply; important for individuals who elope.
Social skills supports:
- Social story apps and video modeling platforms: mid-tech; used at home and school; low motor demand; trials often available through SLPs and special education teachers.
An autism-friendly environment supports AT use. A tool that works in a calm home setting may fail in a loud, visually busy classroom without environmental adjustments.
How to implement the selected AT and train everyone involved
Selecting the right tool is only half the work. Devices get abandoned when implementation is rushed or training is incomplete.
A first-week introduction plan for a communication or scheduling tool:
- Day 1–2: Introduce the device in a low-demand, familiar setting. Let the person explore it without pressure to use it correctly.
- Day 3–4: Model the target function (requesting, navigating a schedule) without requiring the person to imitate. Pair with a preferred activity.
- Day 5–7: Begin structured practice with the target task. Record baseline data on independent use and prompt level.
Training must cover three groups: the person using the device, the caregivers at home, and the school staff. Each group needs to know basic operation, how to troubleshoot common failures, and how to embed the device into existing routines rather than treating it as a separate activity.
Maintenance checklist:
- Schedule regular software updates and updates after major operating system releases.
- Back up device settings and vocabulary files weekly (or after any customization).
- Know the warranty terms and the vendor’s replacement process before the device is needed.
- Track subscription costs for apps or cloud services in the IEP budget discussion.
- Document ongoing effectiveness at least monthly: task completion rate, prompt level, and any new barriers.
AT implementation is ongoing. As the person’s skills grow and environments change, the tool may need to be updated, simplified, or replaced. Build a review date into the IEP from the start.
Where to get devices and common U.S. funding routes
Funding sources, in order of accessibility:
- School district (IEP/LEA): If AT is required for FAPE, the district pays. This is the first and most direct route for school-age students.
- Medicaid and waiver programs: Many states cover AT through Medicaid Home and Community-Based Services (HCBS) waivers. Eligibility and covered devices vary by state; a Medicaid service coordinator can clarify what is available.
- Private insurance: Coverage requires documentation of medical necessity. An evaluator’s report with task-based outcome data significantly strengthens the claim.
- Charitable grants: Organizations like the United Cerebral Palsy Foundation, the Autism Society of America, and state-level disability foundations offer equipment grants. Applications typically require an evaluator’s recommendation and trial documentation.
- Vendor loan and demo programs: Many AAC device manufacturers offer loan programs allowing families to try devices for extended periods. Ask the vendor directly before purchasing.
- AT lending libraries: Many states operate AT lending libraries through their Assistive Technology Act programs. These allow families to borrow devices for extended trials at no cost.
Steps to request school funding:
- Submit a written request for an AT assessment to the IEP team coordinator.
- Provide consent for the evaluation.
- Participate in the assessment and trial process; collect and share home-based data.
- At the IEP meeting, request that the device and AT services be listed explicitly in the IEP.
- If the district denies the request, ask for the denial in writing and consult a special education advocate or attorney.
For third-party payers, the most persuasive documentation package includes: the evaluator’s written report with credentials, trial data showing task completion rates and prompt levels before and after the device, and a letter of medical necessity from a physician or SLP.
Typical timeline from assessment to device in hand
Realistic expectations prevent frustration. Here is what the process typically looks like, from first request to active use:
| Phase | Typical duration | Notes |
|---|---|---|
| Written AT assessment request | Typically initiated quickly | Submit to IEP coordinator or special education director |
| School consent and scheduling | Usually within a few weeks | District must respond within state-mandated timelines |
| Formal AT assessment | Several weeks | Includes observation, data collection, and feature-matching |
| Device trial in natural environment | Several weeks | Minimum trial duration depends on device complexity |
| IEP meeting and decision | Usually within a few weeks after trial | Team reviews trial data and documents AT in IEP |
| Procurement and setup | Several weeks | Varies by vendor, funding source, and customization needs |
| Initial training | Usually a couple of weeks | Staff and caregiver training before full implementation |
Cost factors by technical level:
| Technical level | Typical device cost range | Likely funding source |
|---|---|---|
| No-tech | — | Family or school supplies budget |
| Low-tech | — | School district or family |
| Mid-tech | — | School district, grants, or insurance |
| High-tech | — | IEP/LEA, Medicaid waiver, or private insurance |
Subscriptions, accessories (cases, mounts, styluses), and annual software fees add to the total cost of ownership. Build these into any funding request from the start.
When the chosen AT isn’t working: a diagnostic checklist
A device that isn’t being used is not a failure of the person. It is a signal that something in the match, training, or environment needs adjustment.
Diagnostic checklist:
- Sensory discomfort: Does the person avoid touching, wearing, or looking at the device? Check weight, texture, sound output, and screen brightness.
- Motor access mismatch: Is the person missing targets, fatiguing quickly, or avoiding the device after extended use? Consider switch access, eye gaze, or a different input method.
- Insufficient training: Can the person demonstrate the primary function independently? If not, training was not complete before the device was expected to perform.
- Environmental barriers: Does the device work in all required settings? Connectivity issues, noise interference, and physical space constraints all affect use.
- Technical failures: Is the device freezing, losing charge, or producing errors? Rule out hardware and software issues before concluding the tool is a poor fit.
- Social stigma: Has the person expressed embarrassment or refused to use the device in public? Form factor and peer reactions matter, especially for older students.
Immediate fixes to try:
- Adjust volume, brightness, and haptic settings to reduce sensory load.
- Change the mounting position or add a handle for easier access.
- Simplify the interface: reduce the number of visible buttons or vocabulary pages.
- Add a caregiver prompt schedule to rebuild the habit of reaching for the device.
- Extend the trial period by two weeks with more frequent coaching sessions.
If none of these adjustments produce improvement, reconvene the IEP team. Request a new trial with a different device or feature set, or escalate to a certified AT specialist for a more detailed evaluation. Ongoing monitoring is built into best-practice AT implementation precisely because first choices do not always hold as skills and environments evolve.
Key Takeaways
Selecting adaptive technology for autism works when you match specific task demands to tool features, run short trials with objective data, and document results in the IEP before procurement.
| Point | Details |
|---|---|
| Assess one task first | Define the exact functional barrier before naming any device or software. |
| Use the SETT framework | Work through Student, Environments, Tasks, then Tools to avoid premature product selection. |
| Trial data wins disagreements | Two to three weeks of objective trial data resolves team disputes and strengthens IEP and funding requests. |
| IDEA requires AT consideration | Districts must consider AT at every IEP review and fund it when required for FAPE. |
| Autismdoctorsearch helps you find evaluators | Search the directory to locate local SLPs, OTs, and AT-aware providers who can conduct assessments and support trials. |
What realistic AT adoption actually looks like
The technology selection process gets presented as a clean linear workflow, and in practice it rarely is. A family requests an assessment, waits six weeks, gets a recommendation, trials a device for two weeks in school but never at home, and then wonders why the child refuses to use it by week three. That gap between school and home use is one of the most common reasons AT fails, and it has nothing to do with the device.
What actually works is smaller and slower than most guides suggest. A teacher who spends five minutes every morning modeling the visual schedule app before expecting the student to use it independently. A parent who keeps the AAC device on the kitchen table during dinner, not locked in a backpack. A caregiver who notices that the student uses the device more readily when the screen brightness is turned down and the case is a preferred color. These are not dramatic wins. They are the real ones.

Low-tech tools deserve more credit than they get. A laminated visual schedule that a student carries in their pocket and uses independently across multiple settings is a better outcome than an expensive device that requires a staff member to operate it. The goal is independence, not sophistication.
Involving the person with autism in the selection process changes adoption rates in ways that are hard to overstate. Letting them choose between two device colors, pick a preferred voice output, or reject a tool that feels uncomfortable on their hands is not a small accommodation. It is the difference between a device that gets used and one that sits in a cabinet. Their preferences are data, and they belong in the assessment record alongside task completion rates and prompt levels.
Find local AT evaluators and providers through Autismdoctorsearch
Knowing the selection process is one thing. Finding a qualified evaluator in your area who can actually run the assessment, conduct device trials, and write the documentation your IEP team needs is another problem entirely.
Autismdoctorsearch gives caregivers and educators a direct path to local therapy and evaluation services, including SLPs, OTs, and AT-aware providers listed by location. Instead of searching across multiple agency websites, you get a single directory built specifically for autism-related services across the U.S.
When you contact a provider through the directory, ask these questions on the intake call: Do you conduct formal AT assessments? What is your experience with feature-matching and device trials? Can you write documentation for IEP teams and third-party payers? Do you have experience with Medicaid waiver funding requests?
Search the Autismdoctorsearch directory now to find a qualified evaluator near you and get the assessment process started.
Authoritative sources and next reads
These U.S. resources are worth bookmarking before your next IEP meeting or funding appeal:
- IDEA AT Guidance (U.S. Department of Education) — The federal legal baseline for AT consideration, provision, and FAPE obligations. Print this for any IEP meeting where AT is disputed.
- AT Decision-Making Tool (OCALI/ATAEM) — A six-step stepwise guide for teams moving from task identification to tool selection. Practical and free.
- ATIM AT Assessment Process Module — Covers formal assessment methodology, feature-matching, and trial protocols with professional-level detail.
- ATAEM AT Resource Guide — Explains the full AT process from assessment through implementation and monitoring; useful for understanding what ongoing support should look like.
- Utah Assistive Technology Considerations Guide — One of the clearest state-level guides available; applicable to educators and families in any state.
- Child Mind Institute: How to Get AT in School — Practical guidance on requesting evaluations, working with school teams, and advocating for the right tools.
This article provides general information about assistive technology selection and U.S. legal frameworks. It is not legal or clinical advice. Confirm current IDEA requirements and state-specific procedures with your district’s special education office or a qualified professional.


